|
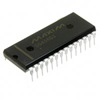
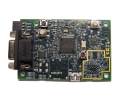
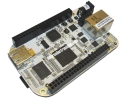
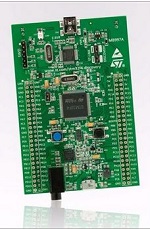
- Microcontroller ATmega32u4
- Operating Voltage 5V
- Flash Memory 32 KB of which 4 KB used by bootloader
- SRAM 2.5 KB
- EEPROM 1 KB
- Clock Speed 16 MHz
Communication
The Leonardo the Esplora has a number of facilities for communicating with a computer, another Arduino, or other microcontrollers. The ATmega32U4 provides serial (CDC) communication over USB and appears as a virtual com port to software on the computer. The chip also acts as a full speed USB 2.0 device, using standard USB COM drivers. On Windows, a .inf file is required. The Arduino software includes a serial monitor which allows simple textual data to be sent to and from the Arduino board. The RX and TX LEDs on the board will flash when data is being transmitted via the USB connection to the computer.
The ATmega32U4 also supports SPI communication, that can be accessed through the SPI library.
The Esplora can appear as a generic keyboard and mouse, and can be programmed to control these input devices using the Keyboard and Mouse libraries.
Programming
The Esplora can be programmed with the Arduino software (download). Select "Arduino Esplora" from the Tools > Board menu. For details, see the getting started page.
The ATmega32U4 on the Arduino Esplora comes preburned with a bootloader that allows you to upload new code to it without the use of an external hardware programmer. It communicates using the AVR109 protocol.
You can also bypass the bootloader and program the microcontroller through the ICSP (In-Circuit Serial Programming) header; see these instructions for details.
Esplora Library
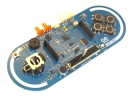
To facilitate writing sketches for the Esplora, there is a dedicated library that contains methods for reading the sensors and writing to the outputs on-board.
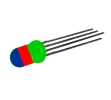
The library offers high level methods which provide pre-processed data, like degrees Fahrenheit or Celsius from the temperature sensor. It also enables easy access to the outputs, like writing values to the RGB LED.
Visit the Esplora library reference page to see the complete documentation of the library and examples.
Automatic (Software) Reset and Bootloader Initiation
Rather than requiring a physical press of the reset button before an upload, the Esplora is designed in a way that allows it to be reset by software running on a connected computer. The reset is triggered when the Esplora's virtual (CDC) serial / COM port is opened at 1200 baud and then closed. When this happens, the processor will reset, breaking the USB connection to the computer (meaning that the virtual serial / COM port will disappear). After the processor resets, the bootloader starts, remaining active for about 8 seconds. The bootloader can also be initiated by pressing the reset button on the Esplora. Note that when the board first powers up, it will jump straight to the user sketch, if present, rather than initiating the bootloader.
Because of the way the Esplora handles reset it's best to let the Arduino software try to initiate the reset before uploading, especially if you are in the habit of pressing the reset button before uploading on other boards. If the software can't reset the board you can always start the bootloader by pressing the reset button on the board
|
|
|


 Facebook
 Twitter
 Linkedin
 Youtube